
Bushnell Trail Cam – Overview
We’ve owned a trail camera for just over a year now and of all the gadgets we have purchased, this has been the most interesting. It’s always exciting each time we retrieve the SD card and download video or pictures to the PC, with the feeling of never quite knowing what might appear.
So, why is trail camera useful?
1 – To record wildlife that you are realistically unlikely to see, let alone photograph. In our case, I’m referring to nocturnal animals like the genet.
2 – To scout out potential areas to learn about animals routines with the goal for setting up a viewing place (to photograph with a DSLR).
3 – To simply just enjoy watching wildlife without disturbing them.
There are several brands manufacturing trail cameras – including Stealth Cam, Scoutguard, Spypoint, Uway, Moultrie. However, Bushnell appear to be the market leaders. Whether this means the Bushnell product is superior I cannot say, having no experience with the others. We currently use a Bushnell Trophy Cam 119466 (2011) and 119437 HD model (2012). (N.B. We have no affiliation with Bushnell).
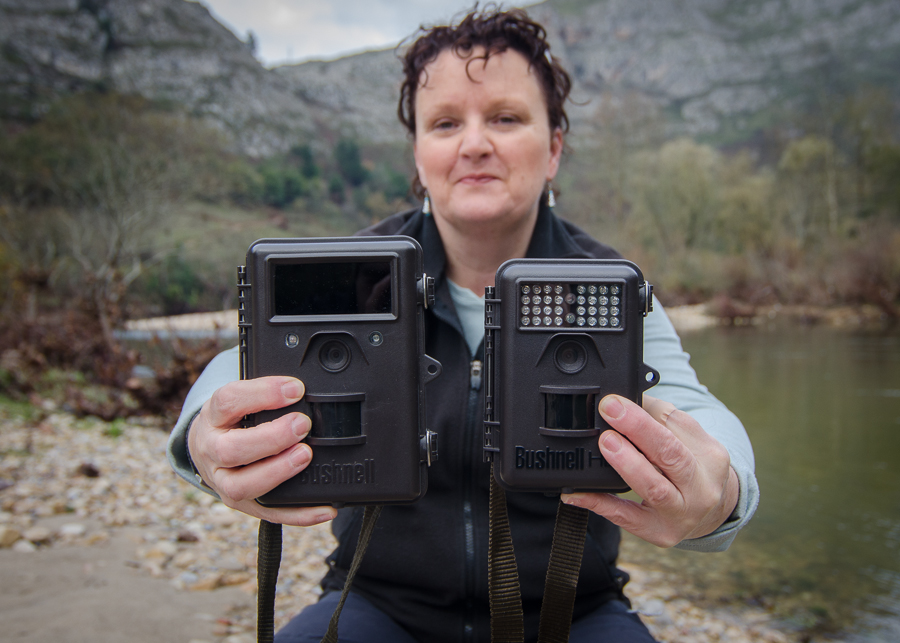
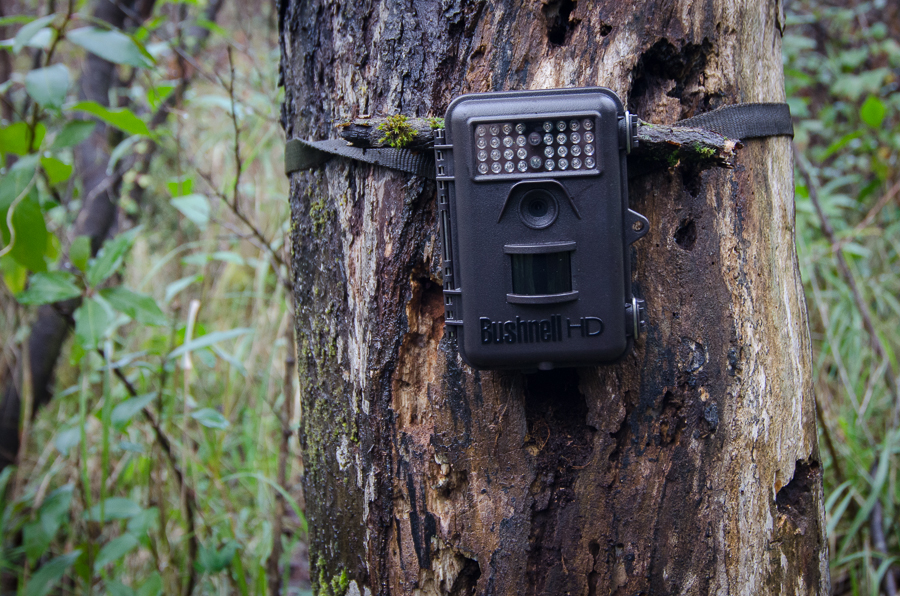
Bushnell HD Trophy Cam (119466) & (119437)
Compact Size
Although the 119437 is noticeably smaller in your hand, both are small, solid units.
Dimensions;
119466 – 160cm height, 110cm width, 65cm depth
119437 – 140cm height, 110cm width, 65cm depth
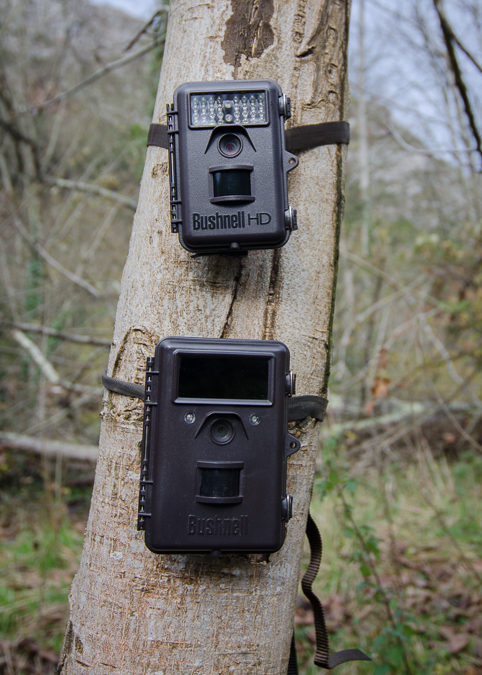
Bushnell HD Trophy Cam – 119466 (pictured below) & 119437 (pictured at the top)
Parts & Controls
Bushnell HD Trophy Cam (119466) & (119437)
Weather resistant
Our cameras have experienced heavy rain and cold temperatures. We never had an issue with the casing or seals. They are compact, tough units, I think the only potential damage on site could be a falling tree or branch or from an animal curious animal (both unlikely).
The Bushnell commercial has footage of one camera in Texas, USA surviving a bush fire – click here . Quite impressive.
The only weather related issues we come across is battery life on cold temperature – see below
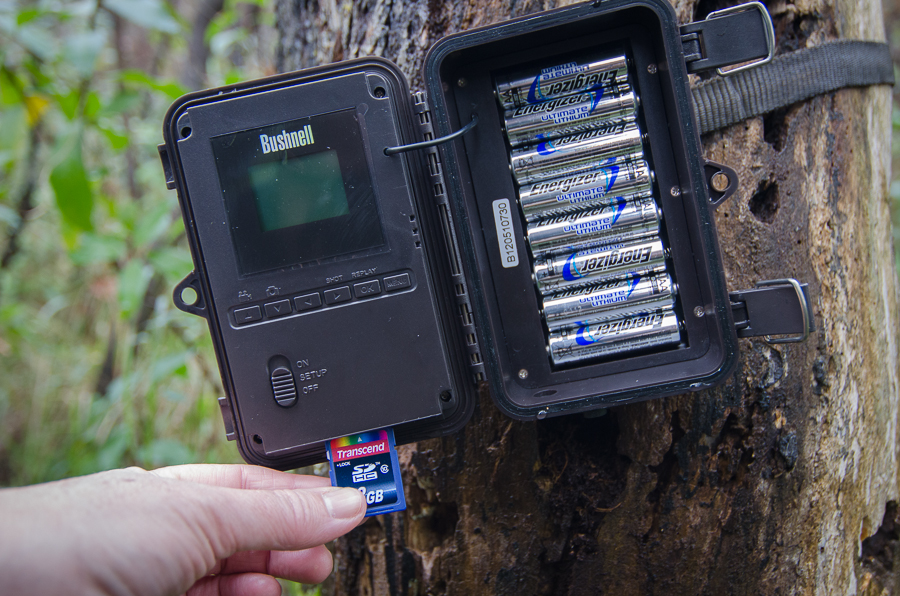
SD Memory Cards
We’ve used two card types. Sandisk Extreme III 4gb (Class 6, 30MB/s). Transcend SDHC 8gb (Class 10). Both performed well. Cards are currently so cheap an 8gb is a good option unless you are carrying out a long-term project in which battery life will probably be the main concern.
Formatting the SD card after you’ve transferred the files seems to be vitally important. Always perform the format procedure within the trophy cam. We experienced some cases of file corruption and put this down to formatting from the PC. We now also allocate individual cards to specific cameras as an extra precaution.
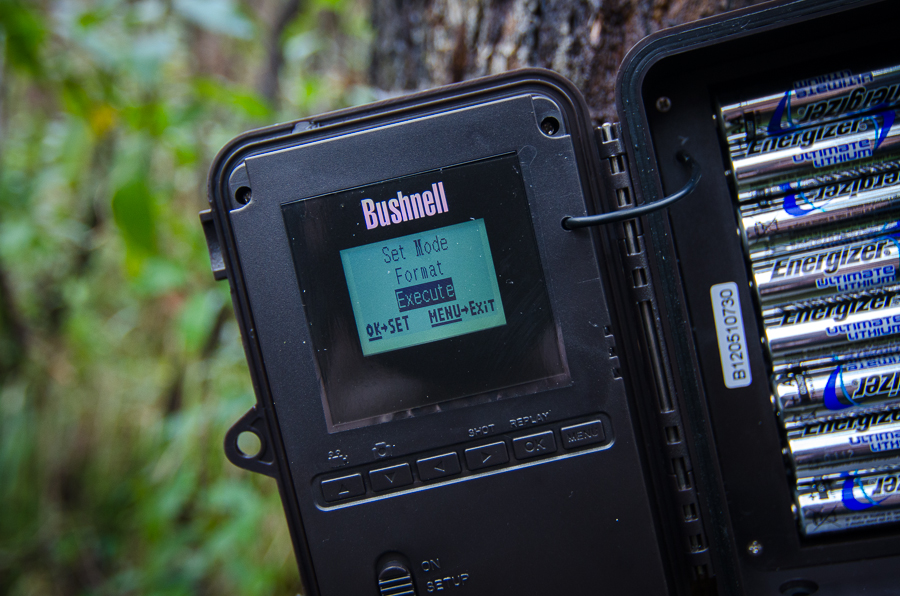
Always format the card in the camera (not on the PC not any other device)
Batteries
In our experience alkaline batteries worked fine in the summer months. I suspect (my opinion, I have no concrete prove) if the camera was triggered repeatedly (may be branches blowing in the wind), alkaline batteries discharge quickly.
In this case we noticed two scenarios;
1) the camera creates files but with no data
or
2) the camera switches off temporarily, but then recovers and start working again.
We also noticed problems into autumn when the night temperature drops (but still above freezing) with batteries discharging and working again during the daytime. We now switched to Energizer Ultimate Lithium which has solved this.
Positioning the Trail Cam
For fixing the camera in position, our models comes with an adjustable strap and plastic buckle. The strap is long enough to wrap around a wide tree trunk and with small trees, you can double up for extra security. This works fine but more often that not the best location for filming doesn’t have a convenient flat surface available.
We ruled out the Bushnell tree bracket (model# 119652C) as it could draw extra attention to the camera, especially as we are using remote sites.
To overcome this we do the following;
- Use sticks or wooden wedge to pad-out the camera and gain the best angle.
- Using a gorillapod or similar can be very useful. The trail cam has a tripod socket thread
Carefully wedging sticks at either the top or bottom can help to gain the correct angle
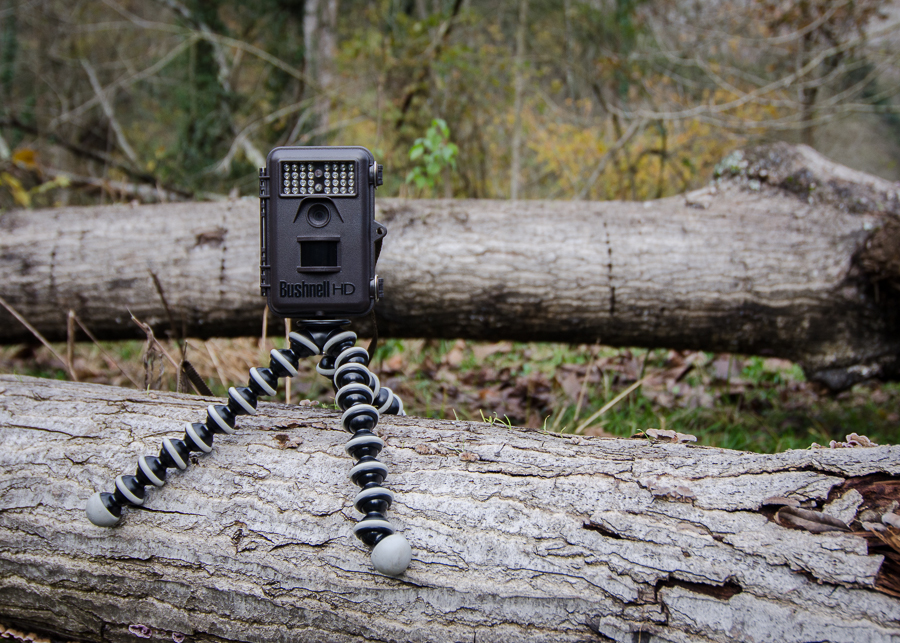
Using a GorillaPod (DSLR Zoom version)
Troubleshooting
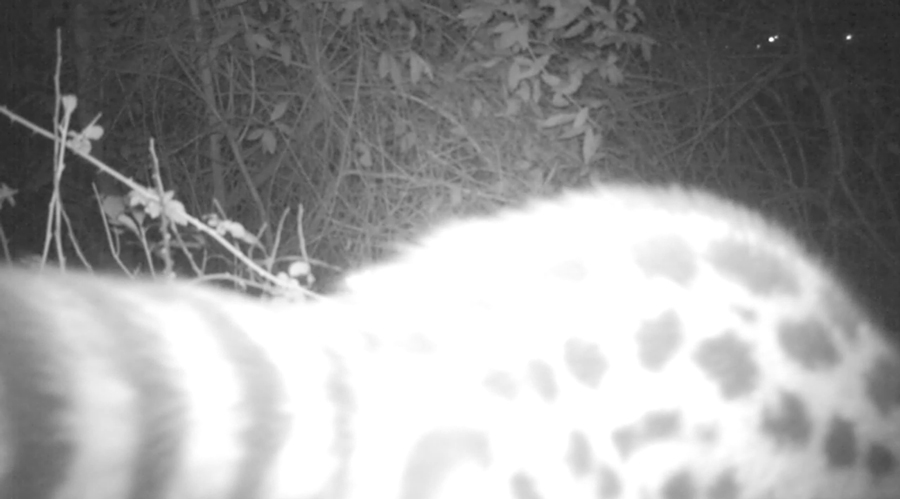
A genet brushing passed the camera
Predicting the likely distance from the trail cam to the subject is the biggest challenge. Bushnell state for best results with night recording, the subject should be no closer than 3 metres. Closer can cause problems with over exposure, the animal will appear white, not ideal.
The reason is the LED IR flash is too strong, and there is no way of reducing it. It tends to be more concentrated in the centre of the frame.
We’ve experimented with ways for reducing the strength of the LED IR flash. Wrap 2 or 3 layers of cling film to cover the LED IR flash. A bit fiddly but I have noticed some improvement.
Other
We would recommend buying field pouch type bag for transporting the cameras, not just for protection but in addition it prevents any unwanted attention whilst you are walking about looking for a spot the fix the camera.
By chance we discovered the Country Innovation bags are a good fit for the Bushnell Trophy Cam though seem to no longer be in production without doubt there are other options out there or use a binocular case.
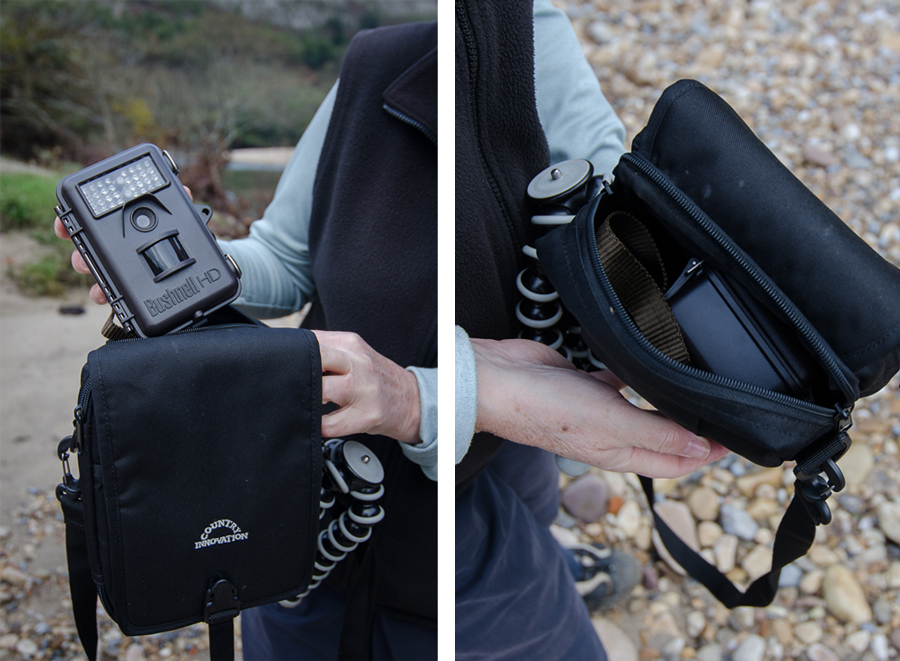
Country Innovation
Videos shot with these Trails Cams
Trail Camera – Discovering Animal Pathways in Asturias
Trail Camera – Badger, Genet, Deer, Boar
Trail Camera – Badger, Genet and Wild Boar
Trail Camera – Woodland animals in Asturias
Trail Camera (Test II) – Badger
Further Reading
Cámaras Trampas (in Spanish/Portuguese)
All Rights Reserved – © John Shackleton – Wild Asturias

Follow Us!